A Clean Rubber Roof:
Why You Should Go Up And Look Things Over Before The Rainy Season
On Your Home On Wheels
At the end of the summer months, it is time to think about cleaning your RV roof. Cleaning the roof on your Class C Motorhome has a dual purpose.
First of all, you want to protect your RV roof investment and potential warranty. The second thing, and it may even be the most important reason for cleaning a roof, is to look for potential problem areas where leaks could occur. After all, a proper RV rubber roof repair always begins with a thorough roof cleaning.
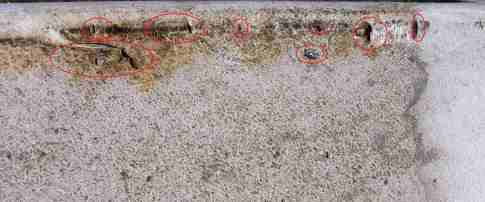
Can Lead To Water Leakage
The above graphic shows where it appears that water may have puddled along the edge of my rig. Where it is circled in red, you can see that the black rubber roof had become exposed. (The second graphic from the bottom of this page shows this area of roof after cleaning and caulking.)
understand it is not a good idea.
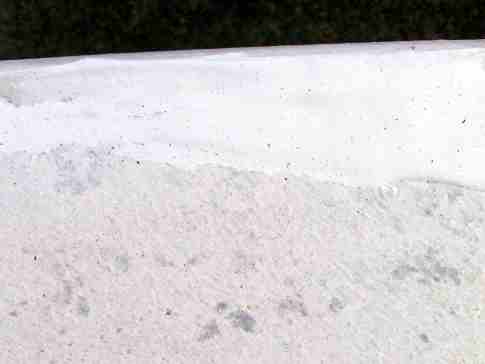
A proper roof cleaning will expose small cracks like the graphic shown below. These cracks may or may not lead to water leaks, but if left unattended water could penetrate through the edge where the roof joins the upper wall of the RV.
The thing is, you won't know until it is too late! This would result in dry-rot damage to the sub-frame. It is better to go the route of prevention and use a self leveling caulk on these little potential problem areas.

If They Are Left Unrepaired
Here again, in the above graphic, you can see an area where water penetration could cause damage. This crack looks pretty obvious; but before cleaning this roof, the grime did a good job of hiding this potential breach.
Properly Cleaning A Rubber Roof
It is important, and it makes all the sense in the world to use a good commercial rubber roof cleanser and a scrub brush.
You will want to get down on your hands and knees and look closely at the edges of the roof/wall areas. You should do a thorough cleaning around any penetration to the rubber roof. You have lots of vents, an air conditioner, and assorted antenna hardware that needs to be checked for cracks and adhesive separation. Don't overlook the various running lights... these things are notorious for leaking water.
Way To Go About It
Several years ago, when I first attempted to clean a roof, I used a hose and simply scrubbed and hosed everything over the side... sweet and simple until I got off of the roof and noticed all the black streaks that I had created along the outside walls of my Class C. Needless to say, it was a pain to clean that mess up.
So, now I go about cleaning my roof a bit differently. I broke down the process of cleaning the roof into manageable sections. I did this by scrubbing a small area of around 3 square feet.
After applying a roof cleanser
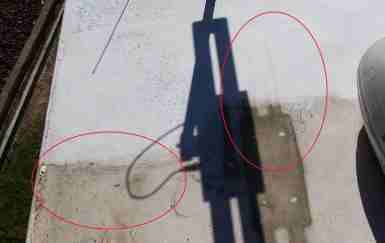
As you can see from the red circles in the above graphic, I am cleaning the roof a section at a time. This will cut down on the cleanup time required if you do not allow the dirty wash by-product to slop over the side of your rig.
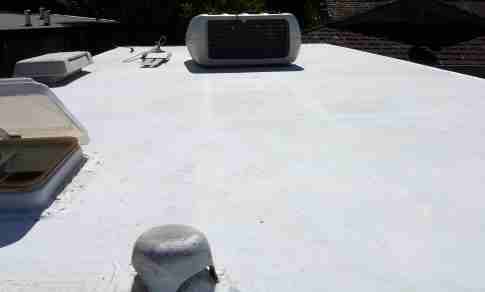
The graphic below shows the same general area as the red circles in the graphic at the top of the page. It shows a cleaner roof and is a better protected area.
I used a self leveling caulk to seal up all areas along the edge of my roof, and I should be good to go for the next winter season. As a note, any of a number of commercial roof cleaning products
Containing Petroleum Distillates
Pay attention to the ingredients in the clean products that you choose. You do not want to use any type of petroleum based distillates on your roof.
When this happens, there is a loss of adhesion. This can allow water intrusion... water intrusion means you will have to do some type of RV roof repair. Trust me, you do not want to go there...
Return To Top Of Page
Leave A Clean Rubber Roof: Why You Should Go Up And Look Things Over Before The Rainy Season! And Return To RV Repair: Sooner Or Later, Something Is Going To Need Fixing!
Leave A Clean Roof: Why You Should Go Up And Look Things Over Before The Rainy Season! And Return To Class C Motorhome: How To Achieve The Maximum RV Lifestyle!
YOUR STORIES
Onan AC Generator Wouldn't Start
1995 Tioga Montara
Had a Leak - Ouch!
A Simple Way To Put An Electrical Thermostat On A Small Space Heater
In A Truck Camper!
A Great Destinaton, With An Unexpected Outcome!
INTERNET SALE!!
Now Available From Magellan! - RoadMate RV9145-Lm 7" Touchscreen GPS W/Lifetime Maps Portable Receiver Made For Motorhomes...
With an Internet Price Of Just $249.08 At Camping World!
Including Lifetime Maps!
Test Link
Below: For An Alternative Destination... A Four Mile Hike Around Sugar Pine Reservoir

A Good Place To Begin The Joshua M. Hardt Memorial Trail Is At The Dam. This 3.5 Mile Trail Is Good For Foot Traffic And Bicycles... No Motorized stuff
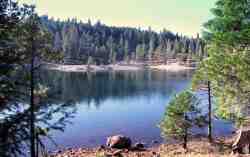
The Manzanita Day Use Area Is A Good Place To Sit And Watch The Wind
Play With The Water!
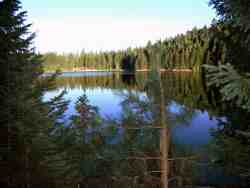
Another View From The Joshua M. Hardt Memorial Trail... Morning and Evening Are The Best Times To Hike This Trail. The Still Reflections Will Capture Your Attention
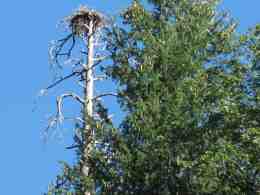
You May Want To Bring A Camera... There Are Large Birds Of Prey High In The Ski


