


RV Tires: That's Where Rubber
Meets The Road!
RV Tires are probably more exposed to the elements than any other part of our running gear. When you think about it, everything on our Class C Motorhome comes in contact with sun, air, and water.
Motorhome tires, travel trailer tires, or any of the RV trailer tires in general not only have to deal the deteriorating effects of these three elements, they also are making contact with a hard road surface, and anything laying on it.

If we can gain a better understanding of how our RV tires are made, will this information allow us to get a longer service life out of them? I believe that it would... and I will tell you why I believe the way I do.
cover the RV tires or they will rot?
Yet, we can leave our cars out in the sun every day, and they appear not to suffer that same type of drying and cracking that the average RV tire develops?
The answer to the above questions has to do with two things.
1. A few key elements that go into a tire.
- Our modern RV tires contain various emollients and waxes (that protect their sidewalls against the effects of ozone contamination) and carbon black (that offers protection against UV damage).
- The manufacturers of our modern RV tires came to understand as early as 1910, when the B. F. Goodrich Company started adding carbon black to the rubber compound, that there was a need to protect the rubber tire from UV (ultra violet light).
- This carbon black barrier must be reapplied periodically or our RV tires become susceptible to UV damage.
- The manufacturers of our modern RV tires came to understand as early as 1910, when the B. F. Goodrich Company started adding carbon black to the rubber compound, that there was a need to protect the rubber tire from UV (ultra violet light).
- Our RV tires were designed to roll down the road.
- If they are used in this manner and kept clean, sidewall deterioration becomes less of a concern. This motion of rolling down the road allows the wax and emollients to work its way up to the surface of the tire and offers protection against ozone contamination.
- If they are used in this manner and kept clean, sidewall deterioration becomes less of a concern. This motion of rolling down the road allows the wax and emollients to work its way up to the surface of the tire and offers protection against ozone contamination.
It seems there are three things that will help prevent UV and ozone damage.
1. Keep the motorhome tires clean
- Like just about everything else we have, if you keep them clean, they will last longer.
- This is something that is easily overlooked, but heavy buildups of mud, sand, or dirt act as an abrasive that prevents the waxing process designed to combat ozone destruction.
- Using a mild soap and water with a soft brush on a regular basis will remove a fair amount of ozone buildup along with the dirt and grime.
- This action enhances waxing. Waxing occurs when we use our RV's. This tire rotation process causes an expansion and contraction motion that allows a slow wax distribution.
- This distribution will, in turn, combat ozone oxidation that, if left unchecked, will result in the drying and cracking of the sidewall on your motorhome tires.
- After you have your RV tires clean, you will want to apply a carbon black product like 303 Aerospace Protectant. As far as I know, this is the only product that will work as advertised in combating UV.
- Another thing to consider is the fact that any tire dressing that contains petroleum products, alcohol, and/or silicone materials may further damage the tire due to a possible chemical reaction with the antioxidant material in the tire.
It works like this... according to Doug Jones, Michelin Tire Product Engineer, "Ozone is the principal enemy of uncovered RV tires. One of the ways tire manufacturers combat ozone is by blending ozone resistant rubber compounds during the making of the tire. These special waxes form a protective barrier against the ozone, but in order to keep up the battle, the waxes must be constantly brought to the surface of the tire".
The flexing of a travel trailer tire will naturally bring wax to the surface on a constant basis. This in done during normal use.
RV tires will rot and crack because they sit stationary for long periods of time, and this inaction results in less wax working its way to the surface. Automobile tires have a tendency not to rot because they are more often in constant use.
This rotting and cracking phenomenon is an important area of consideration because most of us will never wear out our RV tires.
Now we know that we should exercise our RV tires, keep them covered and clean, and put 303 Aerospace Protectant
Unless we drive them with low pressure or with alignment issues, they will usually have good tread on them when they are replaced.
For the record, Michelin recommends that:
- If the cracks are less than 1/32" deep, the tire is O.K. to run.
- Between 1/32" and 2/32", the tire is suspect and should be examined by your Michelin tire dealer.
- If the cracks are over 2/32", the tire should be replaced immediately.
Motorhome Tires Mean?
Well, by watching how your RV tires wear, and if you learn what the different wear patterns are, you can use this information to learn how other parts of your rig's health is doing... such as, front end alignment and shock absorber issues.
You should inspect your RV tires often... once a week isn't too often if the tire is in use. You are doing this inspection because you want to detect any early warning signs of mechanical trouble.
Trouble undetected can shorten your RV tire's life... and that, my friend, is just throwing money away. Trouble detected can also give you clues to other areas of your RV that may need attention.
There are three steps to a complete tire inspection.

- Feel the tread by hand to detect a wear pattern such as feathering
- Examine all six or more of your RV tires
- Check your tread depth with an analog or digital tread gauge.
Here are some descriptions that will help you understand how tire wear relates to suspension issues.
1. Wear Indicator
- All tires made since 1968 have built-in tread wear indicator bars. When tire use degrades the tread depth to 1/16" (1.5mm), smooth 1/2" (13mm) bands seem to rise toward the surface.
- This indicates that these tires should be replaced. Many states have laws making this replacement mandatory.
- When air pressure in a tire is consistently too high, you will see a condition that shows excessive tread wear on the center treads.
- A rarer circumstance that can cause this condition is when someone puts seriously over-sized tires on too small of a rim.
- These situations result in the center area of the tread being pushed out and wearing prematurely.
- If your motor home tires are under inflated, the outside treads will wear prematurely due to unequal pressure across the tread width.
- In essence, when there is not enough air to push the center of the tire to its proper position, the tire is no longer riding on an air bubble. It is, by default, resting on the sidewalls causing outside tread wear.
- If air pressure is consistently checked and found to be correct, this condition could indicate a bent steering component, which causes an incorrect toe-in or toe-out position resulting in abnormal handling characteristics when turning. This could also show the need for a wheel alignment.

4. Feathered Wear
- When you experience a situation where the tread rib becomes slightly rounded on one edge, and a there is a sharp edge on the opposite side of the tread, you have what is referred to as feathering.
- This is usually caused by a tow-in setting that can be corrected with a proper adjustment.
- On occasion when the toe-in is set correctly, you may still experience this feathering condition. This would indicate that you have a deteriorated bushing in the front suspension. This causes a shifting wheel alignment when your Class C Motorhome is moving down the road.

- You can always tell that you are due for a wheel alignment when either the outer or inner rib (tread) wears faster than the rest of the tire.
- This is referred to as being out of camber, or it is sometimes referred to as a one side wear. This is due to excessive camber in your front suspension.
- It will cause the wheel (tire) to either lean to the inside or outside. This will, of course, put an unequal load on one side of your tire.
- This is referred to as being out of camber, or it is sometimes referred to as a one side wear. This is due to excessive camber in your front suspension.
- weak springs
- worn out control bushings
- worn ball joints
- shock absorber
- bushings, etc.
- alignment problems
- If it is an alignment problem, it will require adjustments to be made.
- The key to proper alignment is to make sure you have your rig fully loaded the way you would normally drive the thing.
- If it is an alignment problem, it will require adjustments to be made.
- This is also called cupping. Worn suspension parts that connect to the wheel are usually causing this pattern of cupping.
- These are scalloped, or dips, that appear universally around the edge of a tire. This can happen on either edge.
Wheel balance issues show a little different pattern. It will create a larger bald spot between the outside and center of the tread.
If tire wear issues are discovered quickly, the tire can sometimes be saved if it is rotated to a different location on your rig.
7. Dual Kissing
- When two RV tires in a dual configuration touch, this is referred to as dual kissing.
- Under normal circumstances duals will not kiss and you would not have a problem. However, it can easily happen when one or more of the dual RV tires are low in air pressure.
If they spread enough and touch, you have heating issues that will eventually break down the sidewall and cause a blow-out. This duel kissing condition can them develop into a fatigue rupture.
8. Fatigue Rupture
Fatigue ruptures may be caused by more than one factor:
- improper mounting
- incorrect dual spacing
- under inflation
- casing growth
- In this last case, the fabric casing cords of the tire actually stretch and expand, causing the tire to touch or kiss under load at the contact patch.
- In this last case, the fabric casing cords of the tire actually stretch and expand, causing the tire to touch or kiss under load at the contact patch.
- Fatigue ruptures can occur
if you do not pay attention to your GVWR.
This condition is sometimes called a zipper rip.
- A zipper rip condition occurs when you stress your sidewall beyond their design parameters through an overloaded or under inflated condition, you will create an effect that breaks down the steel casing cords.
- This whole thing acts like a chain reaction. First one cord breaks which adds additional stress to the adjacent cords and so on until a rupture occurs in the sidewall.
- Another cause of a zipper rip is improper tire blocking (improperly leveling of your rig).
- Another cause of a zipper rip is improper tire blocking (improperly leveling of your rig).
This is something that we are all going to have to do on occasion, and some of us will need to do it every time we go out! It just depends. Some places are level, and some are not.
If you have hydraulic levelers, life is easy. For the rest of us, we have to use leveling blocks of some sort.

The challenge is to be able to put all of your tire on these blocks. If you do not, you are running the risk of tire damage.
The thing to avoid is having your tires hang over the edge of the blocking material. You want to use proper blocks that will support your RV tires evenly across the tread width.
You do not want to stick a 2X4 under each tire and call it quits... this will break down your steel belts and open up the possibility for blow-out.
In a perfect world, you would have no need to rotate your tires if you constantly kept the perfect air pressure and alignment.
But, as we have noticed, this is not a perfect world... so we must rotate tires to get their best wear.
Because we do have alignment concerns, under/over inflation issues, and free rolling wear problems, it is best if we follow our manufacturer's rotation policy.
It is also a good idea to include your spare tire in this rotation process. Remember, tires like exercise.
Radial tires should be rotated front to back due to issues with the steel belts. It seems that they like to roll in only one direction. If you reverse them, these steel belts start to break down.
Essentially, if you are satisfied with the tires you have, then it is a simple matter to just replace them.
However, not all tires are equal, and there may be something out there that would suit your needs better.
You want to pay attention to whether or not you should buy a 60,000 mile tire if your last set rotted out after 5 years and 35,000 miles. This is almost a totally subjective decision. At any rate, if you replace your tires, pay attention to sizing.
If you go with a bigger or smaller tire, you may be asking for trouble.
Some things to look at are load rating and gross over sizing.
- You should know how much your rig actually weighs so you can make sure that any new tire replacement is rated for the load you are carrying.
- A good deal on a tire may not be so, if it is underrated for your needs. This sets up a scenario for all types of problems.
- Over sizing a tire becomes a problem when your new big tire surpasses the rim size. This means that your rim and tire are no longer in sync. This will give you odd wear patterns and a possible dual kissing issue.
Here is a question for you... how much tread should wear off of your tire before it is time to replace it?
Generally, if your tread gets down to 2/32 of an inch, it's time to replace them.
However, if wet roads and rain enter the equation, then your tread wear should not go below 4/32 of an inch.
If you try to use your treads down to 2/32 of an inch, you will find yourself hydroplaning. It is simple physics. Water does not compress very well, and it has to be channeled away from the bottom of your tire.
With a tread depth of 2/32" water cannot escape fast enough to do you any good.
It gets worse... what if you are driving in snow? You will need 6/32 of an inch to achieve a "bite".
Back to physics again... you need deeper tread depth because you want the snow to compress into your treads, and then release it as the tire rotates.
Actually, if you are going to be in snow for a long duration, you should use snow tires. But, we have Class C Motorhomes, and that allows us to go where snow doesn't blow. If you live in Alaska or Canada... you could tell me about snow driving... I'm from California!
Understand Your Various GVWRs
One last question... how do you know just how much weight you can put on your RV trailer tires specifically?
When you read the fine print on the GVWR, you will notice that it refers to maximum weight.
If we are not running around with maximum weight on our vehicles, we should be able to let some air out of our tires!
The question is, how much... and why would you want to? Well, we want to let air out if we do not need it because maximum air pressure could result in a very rough ride.
This is not only tough on the passengers, but it stresses the drivetrain as well.
This is not difficult to figure out; however, there are just a few things you need to pay attention to if you are going to start reducing air pressure.
- First of all you must keep air pressure constant on each axle.
- To determine the air pressure for dual tires with uneven weight on the axle, adjust the air pressure for all tires on the axle for the heaviest side.
- To match air pressure load with tire size go to
http://goodyear.com/rv/pdf/rv_inflation.pdf.
- Match your tire size, and then you will see what the limits are with tire pressure and load capacity. You will note that they cap at a recommended speed of less than 65 mph.
Return To Top Of Page
Leave RV Tires: That's Where Rubber Meets The Road! Page And Return To Your Running Gear Is The Foundation To Your Home On Wheels
Leave RV Tires, That's Where Rubber Meets The Road! Page And Return To Class C Motorhome: How To Achieve The Maximum RV Lifestyle!

Your Stories
Onan AC Generator Wouldn't Start
1995 Tioga Montara Had a Leak - Ouch!
A Simple Way To Put An Elecrtrical Thermostat On A Small Space Heater In A Truck Camper!
A Great Destinaton, With An Unexpected Outcome!
2018 Thor 21F Four Winds Class C Motorhome
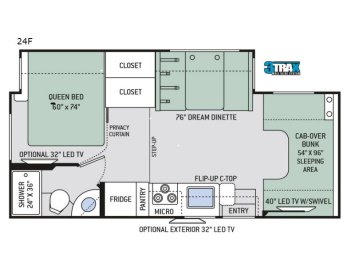
2018 Thor 21F Four Winds Class C Motorhome

2010 Fleetwood Pulse 24D
Class C Motorhome

2010 Fleetwood Pulse 24D
Class C Motorhome
Above Graphics Courtesy of:
http://www.DeMartini.com
| Gasoline Prices |